Last reviewed August 17, 2026Patch sensitivity Medium
Vehicle upgrade value shifts most when module balance, route
access, depth tuning, or base-support costs change.
Quick answer
Early vehicle upgrades should improve survival and efficiency
first. Storage, safety, and practical travel gains are usually
worth more than flashy depth or luxury upgrades before the rest
of the player's systems are stable.
Page media
Use system priority before you lock in the vehicle upgrade order.
Vehicle upgrades land better when their route value is checked
against storage, scanner value, power, and depth safety first.
A good vehicle upgrade makes one repeated route safer, longer,
or easier to bank. If the route still fails for navigation or
storage reasons, do not chase a flashier module yet.
Longer route, practical module.
When travel distance is the blocker, pick the upgrade that turns one known trip into a repeatable loop.
Danger beats luxury.
If visibility, depth, or creature pressure is rising, safety and return margin matter before speed or comfort.
Good fit if
You already have a vehicle, but the next route still feels limited by one clear problem.
You are choosing between storage, safety, depth, or travel efficiency and cannot fund all of them.
You want one upgrade that makes a known route calmer instead of stacking modules by habit.
You suspect the vehicle is the blocker, but need to prove it before spending a good material batch.
Vehicle upgrade decision table
Upgrade the vehicle only when the module solves the route that
is currently limiting progress.
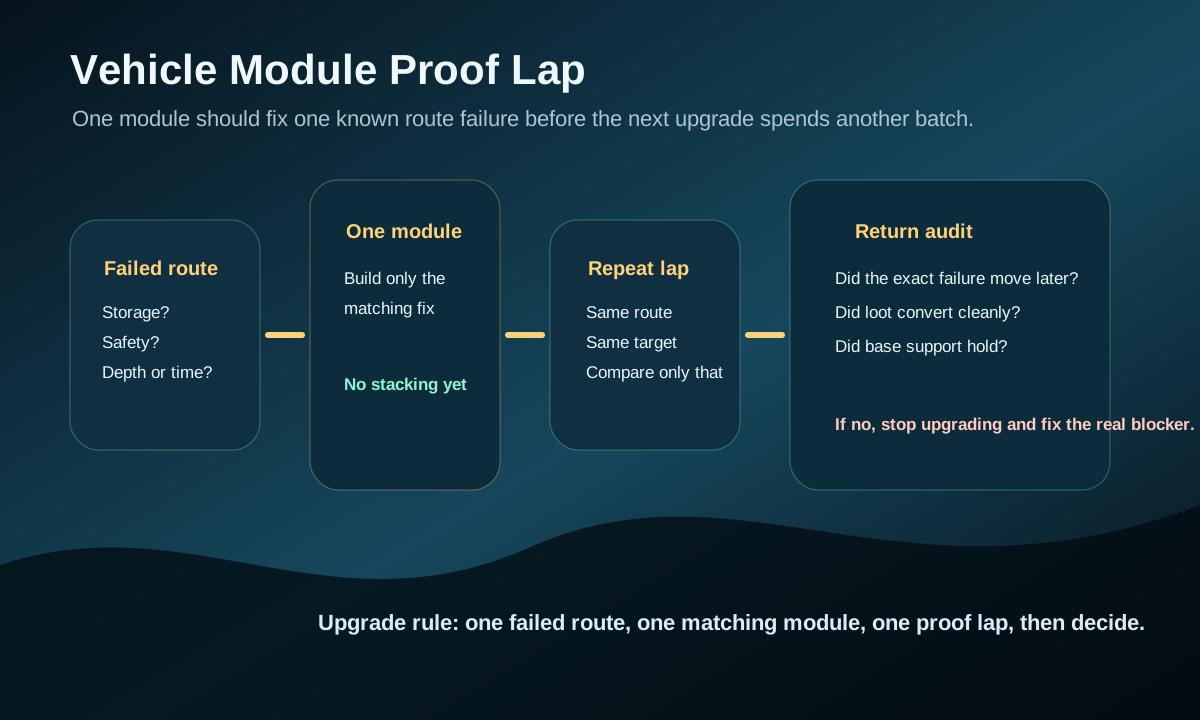
Do not stack modules by habit. Build one matching fix, repeat the same route, then decide whether the vehicle was truly the blocker.Pick the upgrade that solves the current route failure first, then test one calm run before stacking more modules.
Current blocker
Upgrade focus
Best signal
Delay if
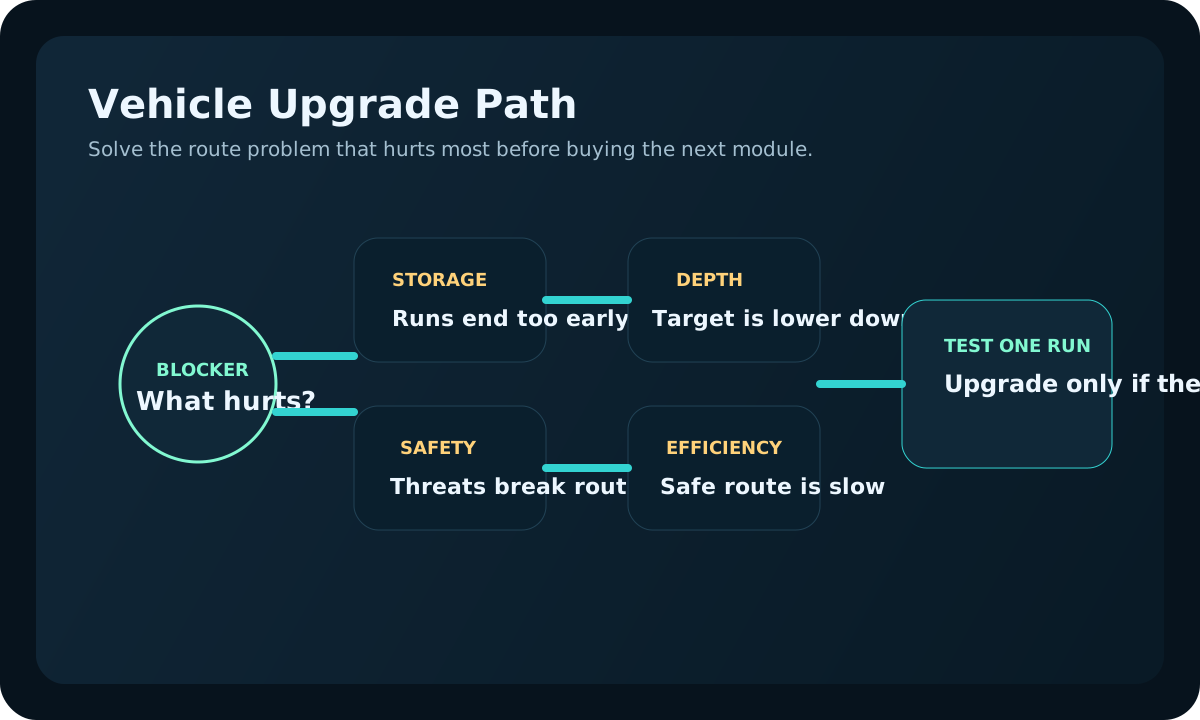
Inventory fills too quickly
Storage
Good routes end before the route is actually done.
The route is unsafe or unclear.
Creature pressure interrupts repeat trips
Safety
You know the route but cannot repeat it calmly.
The smarter fix is avoiding that biome for now.
Target is below current route limit
Depth / access
The next useful material or scan is clearly deeper.
You do not yet know what the deeper route unlocks.
Travel takes too long
Efficiency
The route is safe and valuable but repetitive.
Base storage, power, or scanning is still unstable.
Vehicle readiness roadmap
Before chasing a vehicle: stabilize oxygen,
food, water, storage, and scanning so fragment routes are
repeatable instead of lucky.
Unlock stage: run short scanner loops around
safe biome edges and return after each useful fragment instead
of pushing into unclear terrain.
First vehicle stage: use the vehicle to make
known routes safer and faster before using it to gamble on
deep or hostile zones.
Upgrade stage: choose storage and safety
upgrades before depth-focused upgrades unless a specific route
is blocked by depth.
When to upgrade next
Upgrade storage when good routes end because inventory fills too quickly.
Upgrade safety when creature pressure makes repeat trips unreliable.
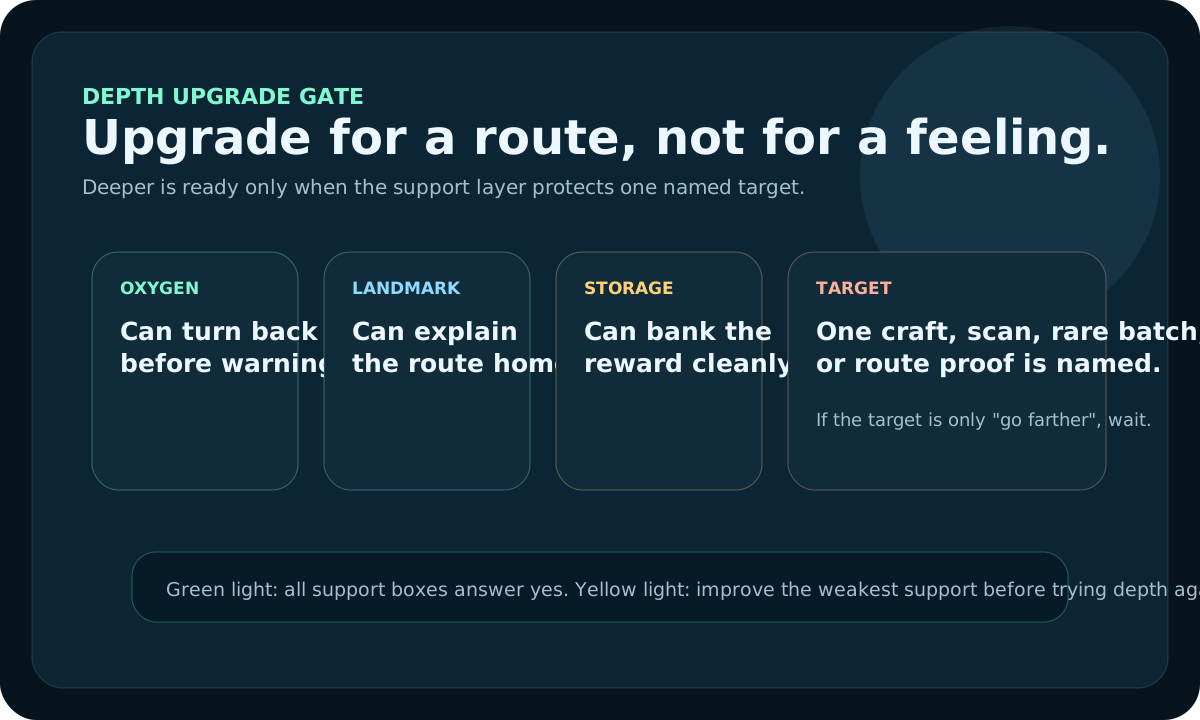
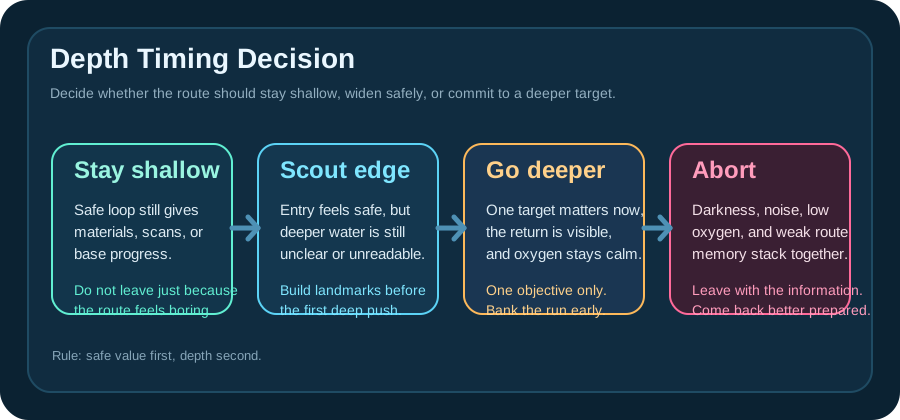
Upgrade depth only when the next target is clearly below your current limit.
Delay luxury modules until base power, materials, and survival tools are stable.
Ready for the next tier when
The current vehicle route is safe but too slow or too small.
The next target is blocked by range, storage, safety, or depth.
Your base can support the upgrade materials without breaking power or storage flow.
Upgrade decision path
Fix the route problem first: storage, safety, range, or depth.
Build only the upgrade that solves that problem.
Test the route once before committing to the next module.
One-upgrade test run
Pick one route that failed recently: too little storage, too
much danger, too much travel time, or a depth limit.
Install only the upgrade that fixes that failure and repeat
the same route once. Do not add multiple modules before
learning which one actually solved the problem.
If the route becomes calm and profitable, keep the upgrade
path. If the route still fails, the real blocker is probably
base power, route planning, oxygen, or biome choice.
Use this first vehicle upgrade test
A good vehicle upgrade should make one known route calmer right
away. If it does not, the upgrade order is probably not the
real fix.
Test step
Do this
Abort when
Good result
Before crafting
Name the one route failure the upgrade is meant to fix: storage, safety, depth, or travel time.
You are installing it because it feels like the next milestone instead of a real route need.
The module already has one practical job before it is built.
First route out
Repeat the same route that failed before and compare only that problem.
You start judging the upgrade on unrelated route problems it was never meant to solve.
The exact failure that used to stop the route now feels calmer or later.
After returning
Decide whether to keep, delay, or change the next module based on that one test.
You immediately queue another upgrade without proving this one worked.
The next upgrade choice is clearer because the previous one was actually tested.
Upgrade traps to avoid
Do not buy depth before you know which deeper material or scan you are chasing.
Do not stack storage if the route is unsafe; safety or a different route comes first.
Do not upgrade travel speed while base power and material sorting are still unstable.
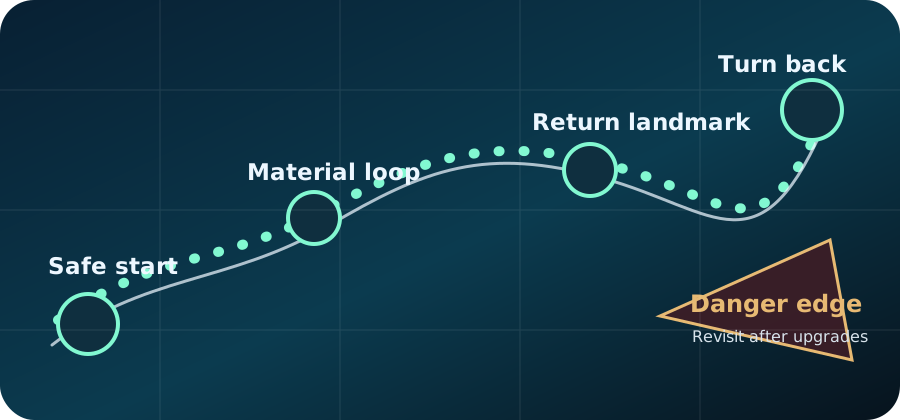
Do not use a vehicle as a reason to skip landmarks; deeper routes still need a return plan.
What usually means the vehicle is not the real blocker
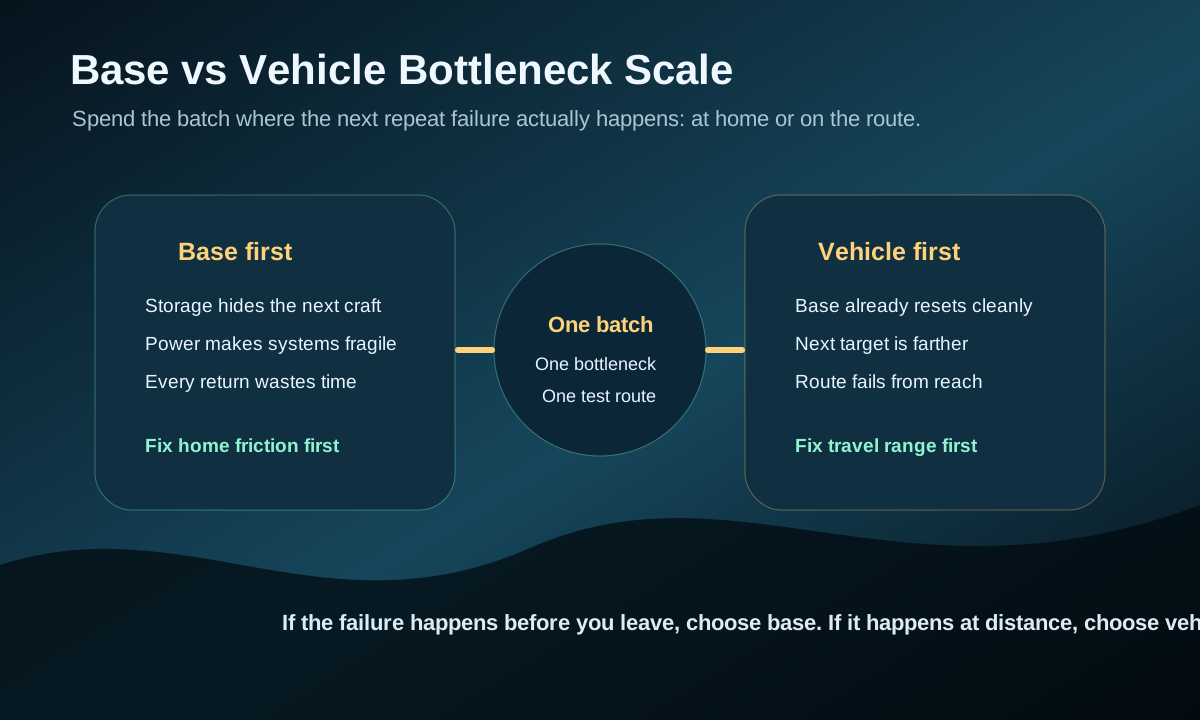
The base still cannot support clean storage, power, or route prep after good runs.
The route is unsafe because landmarks and stop rules are weak, not because the vehicle lacks a module.
The player wants depth or speed upgrades before naming the exact reward those upgrades unlock.
The current vehicle route is still messy enough that almost any upgrade would be hard to judge fairly.
After the proof lap
Treat the first upgraded route as evidence. If the same failure
still controls the run, the next answer is probably base support,
route planning, or a different target rather than another module.
Proof-lap result
Meaning
Next move
Do not
The named failure moved later or disappeared
The module solved the right problem.
Repeat once, then plan the next route tier.
Immediately change targets and lose the comparison.
The route is safer, but the base return is messy
The vehicle worked; home support is now the blocker.
Fix storage, power, or drop-off flow.
Stack another vehicle module to hide base friction.
The route still fails from landmarks or fear
The issue is route discipline, not vehicle stats.
Rebuild the route from a safer edge.
Buy depth or speed before the route is readable.
The upgraded route has no clear reward
The module was ahead of the progression need.
Use scanner or material-priority pages to name a target.
Keep exploring farther just because the vehicle can.
August 16 update: if the upgrade did not help, do not buy the next module yet.
A weak proof lap is useful evidence. Before spending more
materials, identify whether the vehicle failed, the route failed,
or the base could not support the improved trip.
After-upgrade problem
Likely cause
Fix before more modules
Next guide
The vehicle can go farther, but the trip has no clear reward.
Reach improved before the objective was named.
Pick one scan, material, or base-support target before another route.
Stop upgrading when the vehicle stops being the blocker
A common mistake is using vehicle upgrades to hide problems in
base layout, route memory, or material targeting. Stop the
vehicle chain as soon as another system is limiting the next run
harder than the vehicle is.
Stop if every trip returns to messy storage, weak power, or a confusing base handoff.
Stop if the next route still lacks a named target even after the vehicle can reach it.
Stop if the upgraded route fails because landmarks disappear, not because the module is weak.
Choose the first upgrade by route pressure
The first vehicle upgrade should answer the pressure that shows
up most often on screen. If two upgrades look equally useful,
pick the one that makes the next repeat route easier to bank,
not the one that sounds like the bigger milestone.
Route pressure
First upgrade type
What to test
Wrong upgrade signal
You keep leaving useful items behind.
Capacity or storage support
Repeat the same route and check whether the extra carry space becomes real progress.
You return with more random clutter but no clearer craft.
The route is profitable, but creature pressure ruins the return.
Safety or route discipline first
Check whether the vehicle lets you leave earlier and calmer, not whether it lets you fight longer.
You still dodge blindly because the path itself is unreadable.
The target is just out of reach or below the current safe limit.
Reach or access
Confirm one named scan, material, or base-support result before going wider.
The new reach opens more curiosity than actual progress.
The route is already safe and repeatable but wastes time.
Efficiency
Run one before-and-after loop and compare total time, return safety, and value banked.
The time savings disappear because base storage or power still slows the return.
Vehicle upgrade readiness checklist
Do this check before spending a good batch on a module. If the
checklist fails, the better optimization is usually storage,
power, oxygen, or route memory.
July 31 vehicle-upgrade review note
This page now treats the first upgraded trip as the real proof,
not the module purchase. A vehicle upgrade should make one named
route safer, fuller, or easier to bank before the next module is
planned.
Do one before-and-after run on the same route before calling the upgrade successful.
Stop stacking modules if the upgraded route still fails from landmarks, oxygen, storage, or base power.
Use the next upgrade only when the first proof run shows a new, specific bottleneck.
Upgrade debrief after the first route
A vehicle module earns its place only if the next route becomes
easier to repeat. Use this debrief before queuing another
upgrade.
After-route result
Meaning
Next move
Do not
The route banked more value with less panic.
The module solved the right vehicle problem.
Repeat once before planning a new route tier.
Immediately stack another module without a second proof run.
The route reached farther, but the target was vague.
Reach improved, but progression focus did not.
Use scanner or material-priority guidance to name the next target.
Explore wider just because the vehicle can now do it.
The route still failed from bad exits or low oxygen.
The vehicle was not the first blocker.
Fix landmarks, oxygen margin, or safe-biome routing.
Buy speed, depth, or luxury modules to compensate.
The route worked, but home return stayed slow.
The vehicle is ahead of the base.
Fix storage, power, and drop-off flow before upgrading again.
Use the vehicle as a workaround for a bad base loop.