Quick answer
The best early rare material route should balance safety, oxygen pressure, and return value. Players need a route they can repeat cleanly, not a path that only works once at high risk.
Route guide
The best rare material route should feel repeatable, planned, and safe enough to bank progress before greed turns it into a rescue swim.
Rare material routes are sensitive to map layout, biome danger, and progression balance changes, so revisit this page after major patches.
The best early rare material route should balance safety, oxygen pressure, and return value. Players need a route they can repeat cleanly, not a path that only works once at high risk.
Page media
Rare routes are patch-sensitive enough that the safest version of this page starts with one update recheck and one lighter prep follow-up.


Visual read
A rare material run is worth opening only when you know what the material funds, where the safe edge is, and when to turn back before the route becomes a rescue swim.
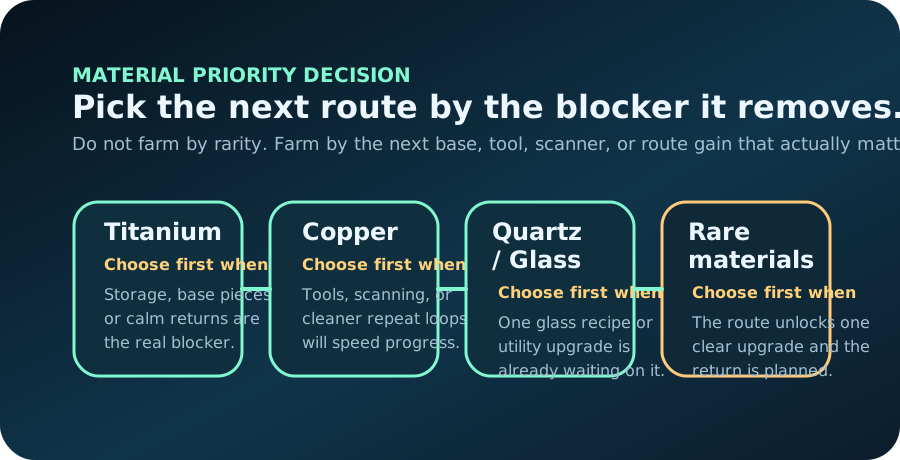
Rare material farming should fund a named upgrade, not fill storage because the route looks valuable.

If oxygen, visibility, or creature pressure shifts at the same time, leave with the materials already earned.
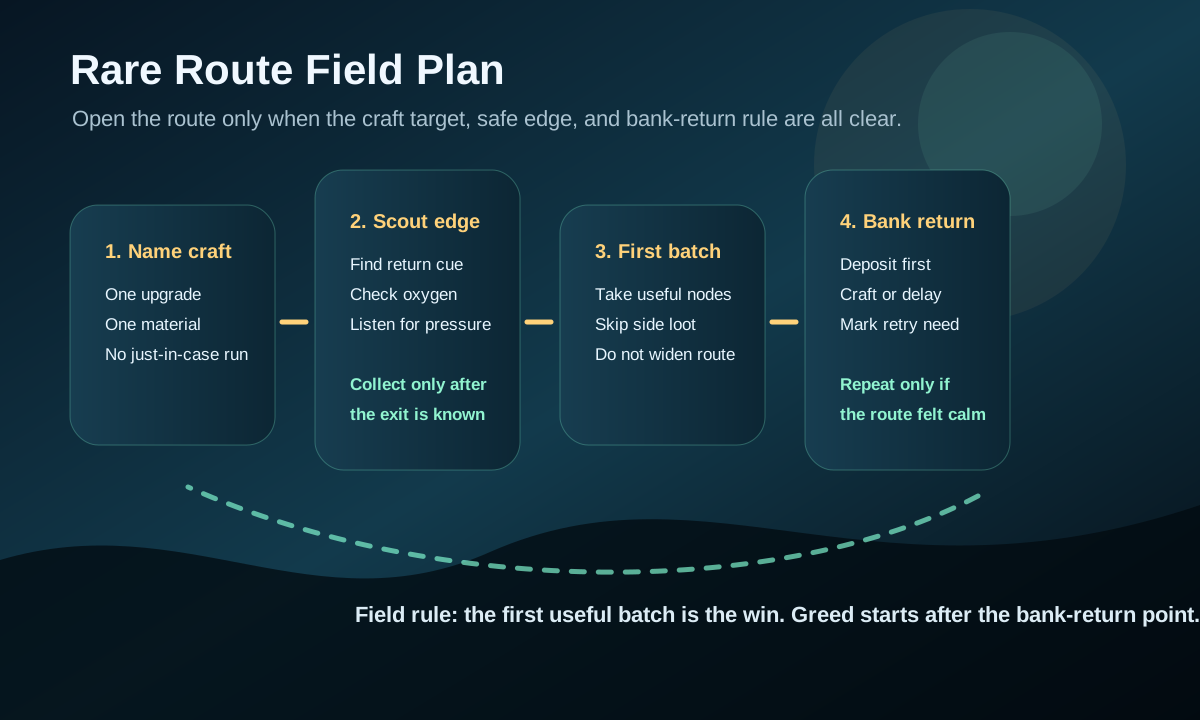
Rare material runs should start with a purpose. Use this table to avoid turning a valuable route into a dangerous detour.
| Before leaving | Good signal | Bad signal | Decision |
|---|---|---|---|
| Target material | You know which upgrade it supports. | You are farming "just in case". | Delay until the craft goal is clear. |
| Route safety | The return landmark is known before collection. | The first node is past an unclear edge. | Scout first, collect second. |
| Inventory | Storage is empty enough for the target batch. | Food, water, and random materials fill slots. | Reset inventory before leaving. |
| Exit timing | The first useful batch is enough progress. | You keep extending because the run is going well. | Bank the run before risk stacks. |
The best rare material route is repeatable: prepare, sweep, collect the high-value nodes, return to storage, then decide whether an upgrade is needed before pushing deeper.
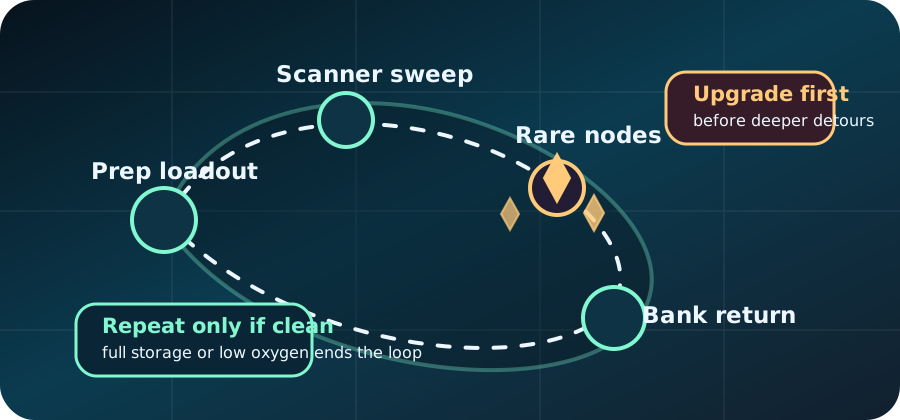
A second rare run should be cleaner, not just bolder. If the first pass only proved the route exists, use the second pass to improve control, not to chase more volume.
| After the first pass | Use the second pass to | Do not use it to |
|---|---|---|
| The route worked, but the return felt narrow. | Refine landmarks, storage space, or abort timing. | Double the loot goal before the route is calmer. |
| The reward funded one useful craft immediately. | Decide whether another batch truly advances the same path. | Repeat automatically because the first trip felt exciting. |
| The route exposed a different blocker. | Reroute into oxygen, base flow, or scanner support first. | Keep farming rare material with nowhere useful to spend it. |
| The run only succeeded because nothing went wrong. | Tighten the route before another collection attempt. | Treat luck as proof that the route is now stable. |
After the first useful return, pause before repeating the same route. The answer should come from what the batch changed, not from the thrill of finding rare nodes.
| Question after banking | If yes | If no | Best next page |
|---|---|---|---|
| Did the batch unlock the planned craft? | Craft it and test one safer route with the upgrade. | Repeat only the known safe edge, not a wider route. | Upgrade priority |
| Was the return calm enough to repeat? | Mark it as a reusable rare loop. | Upgrade oxygen or shorten the target first. | Early oxygen |
| Did storage stay clean after the return? | Keep the same pack list next time. | Fix drop-off flow before another rare trip. | Storage upgrades |
| Did the route reveal a better scanner target? | Turn the next run into a focused scan loop. | Stay with material routes until the target is clearer. | Scanner Room |
The first rare batch should answer the next decision. If it does not unlock something, prove a route, or reveal a safer target, repeating the same trip usually turns progress into risk.
| After-run result | What it means | Next decision | Do not do this |
|---|---|---|---|
| The batch completes the planned craft. | The route served its purpose. | Craft first, then test whether the upgrade changes a normal route. | Repeat the rare route before using the upgrade. |
| The batch is useful but not enough. | The target is valid, but the route needs tighter scope. | Repeat only the proven edge with empty inventory and a smaller goal. | Widen the route just to make the second trip feel different. |
| The return was ugly or hard to explain. | The route is ahead of your oxygen, landmark, or danger control. | Delay and fix the failed support system first. | Call it farmable because one lucky return worked. |
| The route revealed a better target elsewhere. | The trip was reconnaissance, not a farming loop. | Switch the next run to the clearer target and keep the old route as a note. | Force the original rare path because it was already started. |
A rare route is valuable only when it completes a current unlock, removes a repeated blocker, or prepares one specific upgrade. If the route is being opened because the shallow loop feels boring, pause and name the payoff first. Early Access changes can shift hints, density, and progression pressure, so the safest evergreen rule is to connect the route to a craft you will actually use after returning.
The first successful rare route should feel almost too short: scout the edge, collect the named batch, leave while the exit is obvious, and bank the result. Long wandering runs create better stories, but short controlled runs create better progression.
The first rare route should be a short field test. It should prove the edge, collect one useful batch, and return before the trip becomes a general deep-water gamble.
| Pass | Goal | Bank when | Do not add |
|---|---|---|---|
| Scout pass | Find the safe edge, first warning sign, and first visible reward. | You can name the return line and one useful target. | Extra nodes beyond the edge. |
| First batch pass | Collect only the material tied to the current upgrade or craft. | The named batch is secured or the route starts stacking warnings. | Side materials that fill inventory before the route is proven. |
| Repeat pass | Repeat the same line faster and calmer, then decide whether it is a real farming route. | The run feels bankable without emergency decisions. | A deeper branch until the first branch is boring. |
Do not immediately farm more. Convert the batch into the reason it was collected, then judge whether the route still deserves another run.