You are not asking where one material is, but which material deserves the next run.
Decision guide
What material should you farm first in Subnautica 2?
This page exists for the moment players are not asking where one material is, but which material deserves the next safe run.
Last reviewed August 17, 2026
Patch sensitivity Medium
Material order changes most when recipe costs, scanner value, or early route safety make one batch suddenly worth more than the rest.
Match one material batch to one named unlock instead of stockpiling everything.
Reviewed August 17, 2026
Decision-first page
Route payoff checked
Craft-to-route focused
You know the next run should be materials, but you still cannot tell which batch produces the fastest real gain.
You already know the blocker is Titanium, Copper, or Quartz and only need the route itself.
Open the matching material page immediately after naming one recipe, one room, or one system that the batch will unlock.
Quick answer
Farm Titanium first when storage or base basics are blocked, Copper first when tools or scanner progress are blocked, and Quartz first only when a specific Glass or base upgrade is waiting on it. Do not choose by rarity. Choose by the next useful unlock and the safest repeatable route.
Why this page is trustworthy
- It does not rank by rarity: the priority here is based on the next practical unlock, not on what feels scarce or expensive.
- It assumes wasted runs are the real problem: one clean material batch should solve one named craft, one base friction point, or one route blocker.
- Use the narrower pages after this: once the winner is clear, jump into Titanium, Copper, or your exact route page instead of staying in comparison mode.
August 20 structure update
- Fastest answer: choose the batch by the next visible unlock, not rarity or habit.
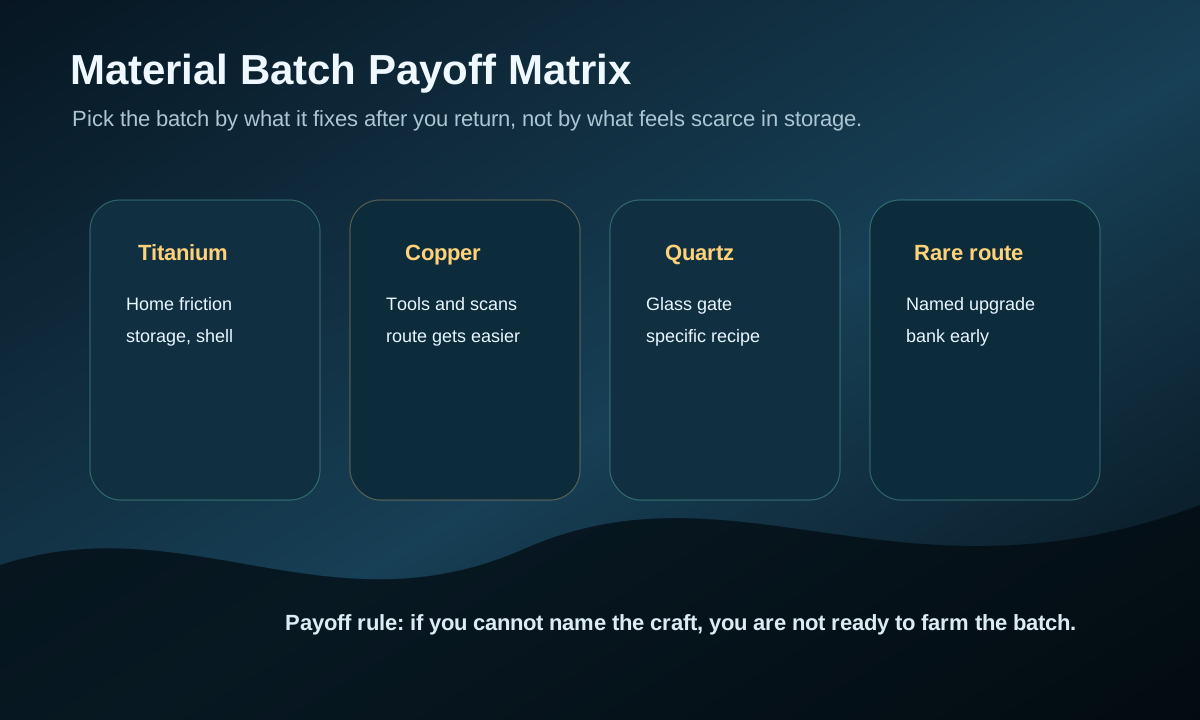
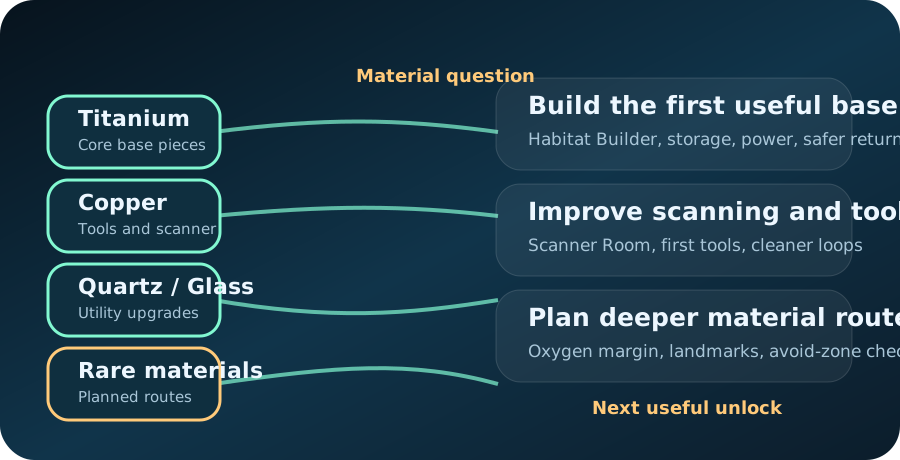
- Functional visual: use the material payoff matrix and resource flow diagram before running another loop.
- Stop rule: stop farming after the named craft, storage fix, scanner step, or route support is covered.
- Report issues: send recipe, route, or payoff corrections through Reader Reports.
July 31 material-decision audit
This page was tightened around a more useful rule for players: a material run should end with one visible upgrade, cleaner storage, or a safer route. If the haul cannot do one of those jobs, the page should send the reader to a different problem.
| Reader's real blocker | Best material call | Why this is not filler farming |
|---|---|---|
| Base return is slow and cluttered | Titanium first | The batch becomes storage, shell, or layout progress immediately. |
| Tools and scans are delaying progress | Copper first | The batch improves the next route instead of sitting in a locker. |
| A known glass or visibility gate is waiting | Quartz only with a named craft | The run has a finish line before the player leaves base. |
Page media
Use these when the material choice still needs a clear payoff.
Start with the exact blocker and jump into the material page that pays it off. This keeps the page useful as a decision hub, not a collection of outside references.
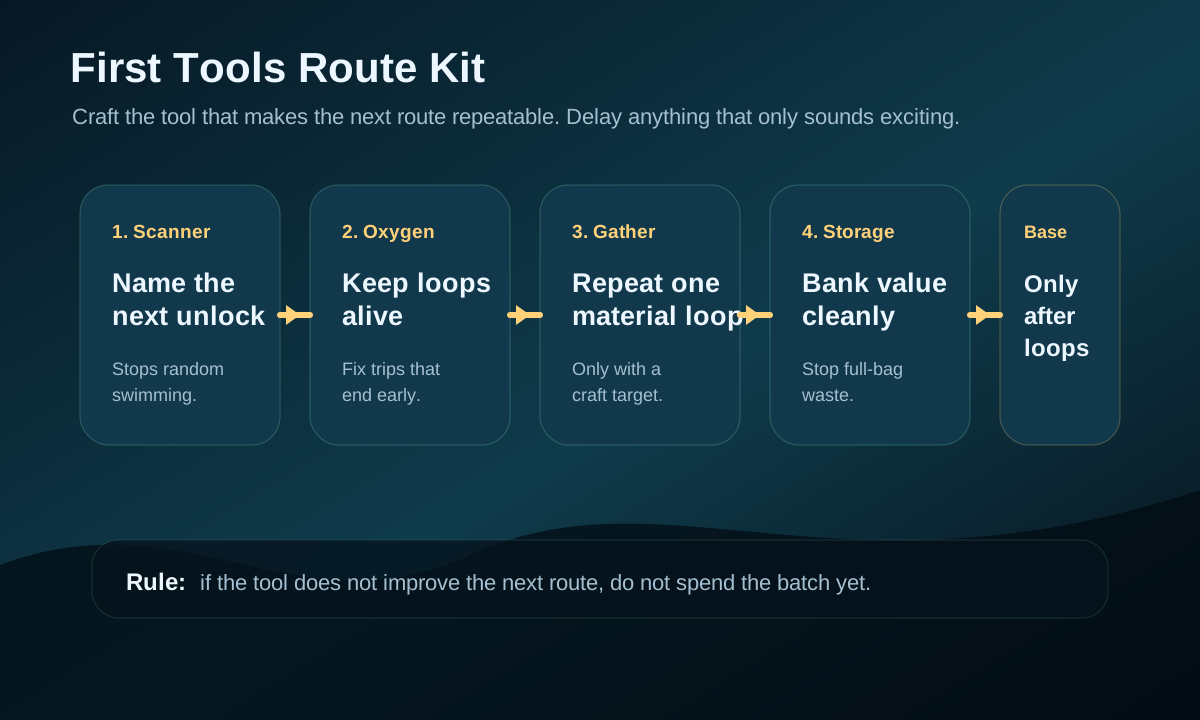
Tool payoff
First tools priority
Open this when the best material is the one that makes the next tool, scan, or safe route possible.

Specific batch
Where to find Titanium early
Open this once home friction, storage, or first-base basics are clearly the real blocker.

Specific batch
Where to find Copper early
If the next useful gain is tools, scanner progress, or route clarity, prioritize that material.
Material priority table
Use this table before leaving base. The right material is the one that removes the next practical blocker, not the one that feels most scarce.
| If this is blocking you | Farm this first | Why it wins | Delay if |
|---|---|---|---|
| Storage, basic rooms, or early base pieces | Titanium | It stabilizes the base loop and reduces repeated panic gathering. | You already have enough for the next useful base step. |
| Tools, scanner progress, or cleaner gathering loops | Copper | It often unlocks the systems that make later routes faster and safer. | Oxygen or route safety is still the bigger problem. |
| Glass, a base utility piece, or one specific upgrade recipe | Quartz | It matters when one waiting craft clearly improves the next route. | You cannot name the exact recipe or route gain yet. |
| You are not sure what the next craft should be | Titanium or Copper | They usually support more flexible early choices than Quartz does. | One known Glass recipe is the actual blocker. |
Real gameplay checkpoints
Use the scene in front of you to decide which material actually deserves the next run.
These screenshots separate three different farming questions: flexible base support, route-efficiency upgrades, and riskier resource trips that may not be worth opening yet.

You only need one clean batch to unlock the next useful home or storage step.
Prioritize Titanium when the next real gain is less friction at home rather than a new system branch.
Open Titanium guide
The route is broader now, and the right batch should shorten the next trip.
Choose Copper first when tools, scanner progress, or easier gathering loops are about to pay off immediately.
Open Copper guide
The route looks valuable, but danger may be outrunning the upgrade value.
Check route timing first when a rarer material loop feels tempting, but still might be more expensive than it is useful.
Open rare-route-worth-it guideChoose Titanium first when
- Inventory pressure is ending every route too early.
- You need storage, foundation pieces, or stable base basics before deeper progress.
- The next useful improvement is about reducing friction at home, not unlocking a new scan or tool.
- You want the most flexible batch for several early crafts at once.
Choose Copper first when
- The next tool or scanner-related upgrade clearly improves the next farming route.
- You already have enough Titanium for the immediate storage or base need.
- The bottleneck is efficiency, not raw base structure.
- You want the next run to feel safer, shorter, or easier to read.
Choose Quartz first when
- A specific Glass recipe is already waiting and you know why it matters now.
- The route is safe enough to fold Quartz into a clean, repeatable loop.
- You are upgrading a base, scanner support path, or tool that changes the next route immediately.
- Quartz is not competing with more urgent Copper or Titanium needs.
Simple early-game decision path
- Name the next craft or base change before opening storage.
- If the next change is storage or basic base function, run Titanium.
- If the next change is tools, scanner support, or route efficiency, run Copper.
- If the next change specifically needs Glass, run Quartz only for that batch.
- After one successful run, stop and convert the material into progress instead of switching into random gathering.
Use this three-run material plan
Most wasted farming comes from trying to solve every future shortage in one trip. Use one of these focused loops instead.
| If the next problem is | Run this loop | Bank the run when | Next move |
|---|---|---|---|
| Home friction, no storage, or base basics | Titanium-only run with no side gathering. | You can place the next storage or base piece without borrowing from another plan. | Build first, then decide whether Copper or route clarity is next. |
| Weak tools, scanner pressure, or inefficient routes | Copper-first run with one named tool or system in mind. | The tool or scanner step is fully covered. | Craft immediately and test whether the next run feels shorter or safer. |
| One Glass recipe that clearly improves the next loop | Quartz run for that exact recipe only. | The specific Glass craft is covered once. | Stop there and convert Quartz into the upgrade before gathering more. |
August 16 update: choose the batch by the failure you just had.
The cleanest material priority is not the rarest item or the longest route. It is the batch that fixes the failure from the previous trip and makes the next trip easier to repeat.
| Last trip failed because | Farm or fix this first | Why this is the priority | Stop after |
|---|---|---|---|
| You returned early because inventory filled with mixed items. | Titanium for storage and basic home organization. | More capacity only helps when the base can turn returns into clear next crafts. | One storage or base-flow improvement is placed and tested. |
| You could not find the thing you meant to gather. | Copper or scanner-support materials, if the scanner/tool step is already known. | A better search tool can shorten repeated farming more than one lucky route. | The next run has a clearer target and takes fewer guesses. |
| You reached the area but the route felt too risky. | Oxygen, landmark practice, or safer route prep before rare materials. | The material is not really available if the return path is still unreliable. | The same route can be repeated without panic. |
| You had the material but still could not craft the upgrade. | The missing companion material, not another generic stockpile. | Priority should follow the recipe blocker, not the material you already understand. | The named craft can be completed immediately. |
Pick the next batch from the failure, not the recipe list
Early Access balance can move, so a fixed shopping list ages quickly. Start with the thing that stopped the last trip and run one narrow loop before changing targets.
| Last-trip failure | Next batch | Proof to bring home |
|---|---|---|
| You could not craft or repair a basic tool. | Gather the missing common material only; skip rare detours. | The tool is craftable and the next missing item is clear. |
| You had materials but no safe place to store them. | Prioritize the storage/base component that shortens the next return. | One deposit cycle is visibly faster or less risky. |
| You reached a new area, then turned back empty-handed. | Repeat the safe approach route and add one survival reserve. | You can return with a landmark, scan, or named resource instead of only a deeper position. |
What to carry on a focused material run
- One named craft target before you leave, so the run ends as soon as that batch is covered.
- Enough open inventory to bank a useful stack without throwing away good loot halfway through.
- A route plan simple enough that you can explain where the run turns around before you start gathering.
- No second farming plan unless the first target is already secured and the return route still feels easy.
After one priority material run
The material priority page should end the farming debate. After one run, check whether the batch actually changed the next route or simply added more storage noise.
| Run outcome | Meaning | Next move | Do not |
|---|---|---|---|
| The batch became a craft immediately | The priority call was correct. | Test the improved route before farming again. | Open a second material route before using the first result. |
| The batch sat in storage | The craft target was not clear enough. | Return to what-to-do-next or a specific craft page. | Keep gathering because the material feels useful. |
| A different material blocked the craft | The next route changed. | Switch to that exact material page. | Finish an arbitrary stockpile first. |
| The route was too risky for the payoff | The timing was wrong, not the material. | Improve oxygen, landmarks, or safe-biome loops. | Force the same material from a bad route. |
Solo and co-op difference
| Mode | Best material rule | Main mistake to avoid | Best follow-up |
|---|---|---|---|
| Solo | Pick the material that fixes the next practical blocker for one person. | Trying to stockpile all three materials in one run. | Best first tools |
| Co-op | Let the team share one priority so everyone does not split into conflicting errands. | Half the team farms Copper while the other half still cannot support storage or returns. | Co-op progression |
If this is your blocker, open this next
| Current blocker | What to farm or fix | Next guide |
|---|---|---|
| You need more storage and base basics | Run Titanium first. | Where to find Titanium early |
| You need better tools or scanner progress | Run Copper first. | Where to find Copper early |
| You need Glass for one clear upgrade | Run Quartz first. | Where to find Quartz and Glass materials |
| You want broader route planning after the choice | Use the resource flow and route hubs. | Resource Database |
First material loop plan
| Loop goal | Farm this first | Switch when |
|---|---|---|
| Stabilize storage and base pieces | Titanium | The next craft is blocked by Copper, Quartz, or scans instead of structure. |
| Unlock tools and route clarity | Copper | The tool path is covered and survival, storage, or Titanium becomes the blocker. |
| Craft Glass or specific utility pieces | Quartz | The needed Glass recipe is covered or the route stops being safely repeatable. |
One-run material planner
Before leaving base, decide what one material run must change in the next ten minutes of play. This keeps the page from becoming a generic recipe list and makes every farming loop measurable.
| Planned result | Best batch | Carry limit | Convert immediately into |
|---|---|---|---|
| Cleaner home flow | Titanium plus the exact companion material for storage or shell pieces. | One storage/base batch, then stop. | Storage upgrades or build order |
| Better route efficiency | Copper if the next tool or scanner step is already named. | Enough for that tool chain, not a vague stockpile. | First tools or Scanner Room |
| One known glass gate | Quartz only after the Glass use case is written down. | One recipe worth of Glass pressure. | Quartz and Glass |
| Route-gated upgrade | Rare material only when survival, route, and return rules are ready. | One upgrade target, empty pockets for mistakes. | Rare run loadout |
Material decisions that prevent low-value farming
A useful material page should help the player leave with a decision, not a larger pile. If a run does not create one of these outcomes, switch to a route, tool, or base page first.
- Named blocker: the material is tied to one tool, room, scanner step, vehicle path, or survival upgrade.
- Named route: the player knows where the run starts, what marks the turnback, and how the batch gets home.
- Named spend: the material is crafted or placed immediately so the next route becomes easier to judge.
- Named next page: after the batch is solved, the player leaves for build order, map routing, or patch review instead of farming again by habit.
Next route map
Open the specific material page only after this decision page names the real batch.

If home friction is the blocker
Where to find Titanium early
If the next useful gain is storage, base basics, or fewer clumsy returns, fund the home loop first.

If route efficiency is the blocker
Where to find Copper early
If tools, scanner value, or readable routes pay off next, choose the material that unlocks them.

If one Glass craft is waiting
Where to find Quartz and Glass materials
Use this only after the page above proved a specific Quartz unlock really is worth the route risk now.