Last reviewed August 17, 2026Patch sensitivity High
Creature threat advice is sensitive to AI behavior, damage tuning,
and route safety changes in new builds.
Quick answer
Early creature threats are best handled by avoiding bad routes,
not by trying to win every encounter. If a creature changes
your path, oxygen margin, and visibility at the same time,
leave and return with better tools.
Page media
Use these route pages before you over-read threat pressure.
Threat pages work better when creature pressure is tied to a
safe route, a turn-back rule, and a clear reason to return later.
Threat guidance should help players recognize when a route is
becoming expensive before oxygen, visibility, and panic stack
together.
Leave before the route collapses.
If a threat changes your path and visibility at the same time, bank the run instead of improvising deeper.
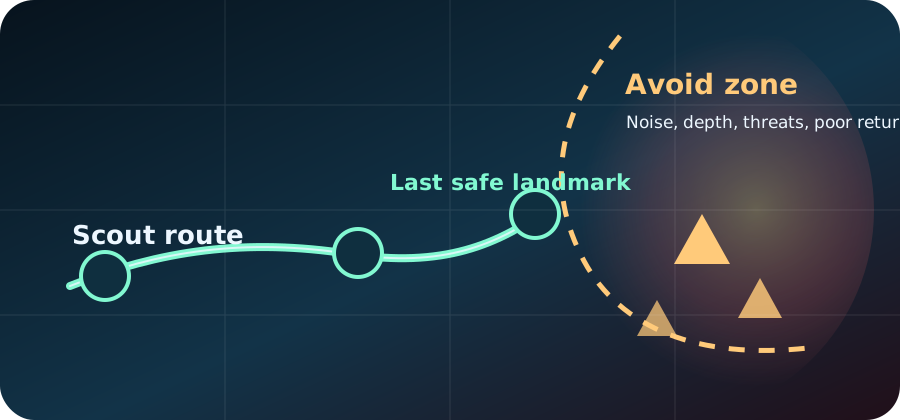
Use retreat landmarks.
A good threat response points back to the last safe landmark, not sideways into a route you have not learned yet.
Creature encounter table
Use this table when a creature interrupts the route. The goal is
to preserve materials and information, not to win the encounter.
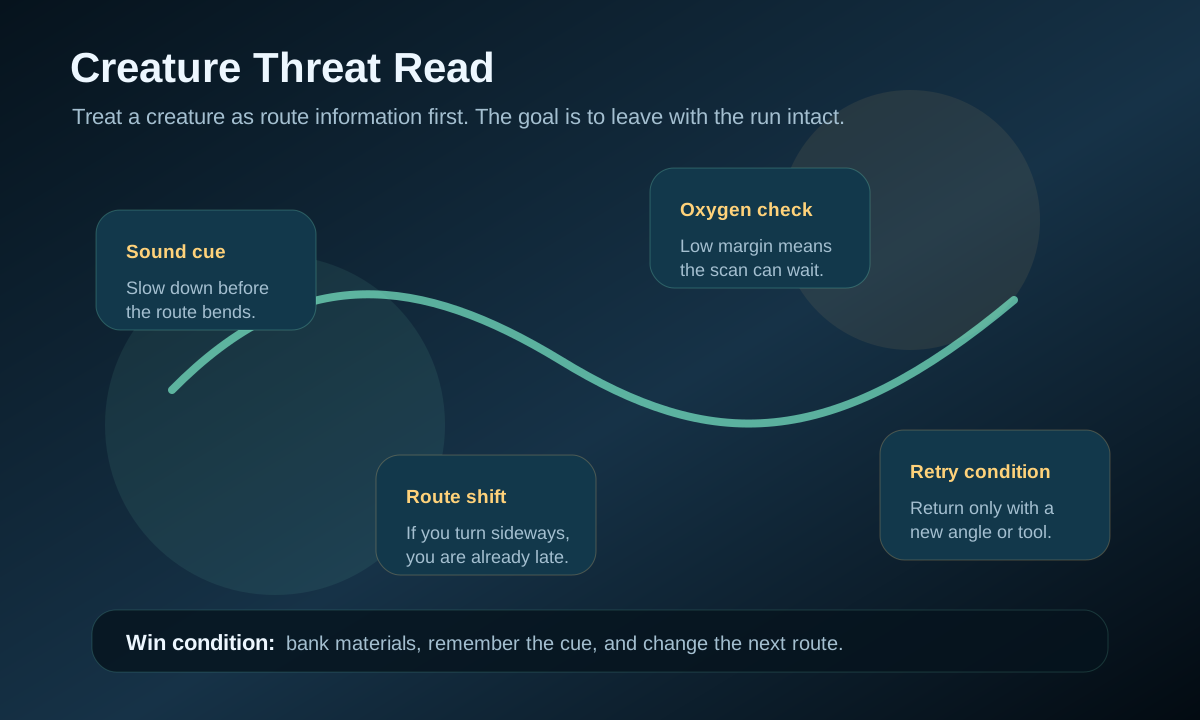
Read the encounter like a route signal: sound cue, path change, oxygen margin, retreat line, then a calmer retry decision.
Encounter
Risk
Best response
Do not
Threat appears near a landmark
Return path may become blocked.
Backtrack to the previous clear landmark.
Swim around it into unfamiliar terrain.
Threat appears while scanning
Focus splits between scan and survival.
Cancel the scan and return later.
Finish the scan if oxygen is already low.
Threat appears with full inventory
Losing the run costs real progress.
Bank materials before re-entering.
Chase one more node or fragment.
Threat appears repeatedly
The route is not stable yet.
Find another angle or upgrade first.
Force the same path because it worked once.
Threat response routine
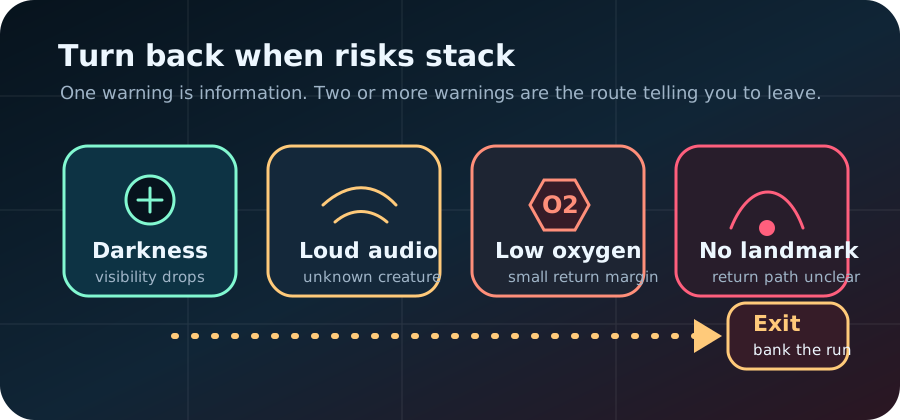
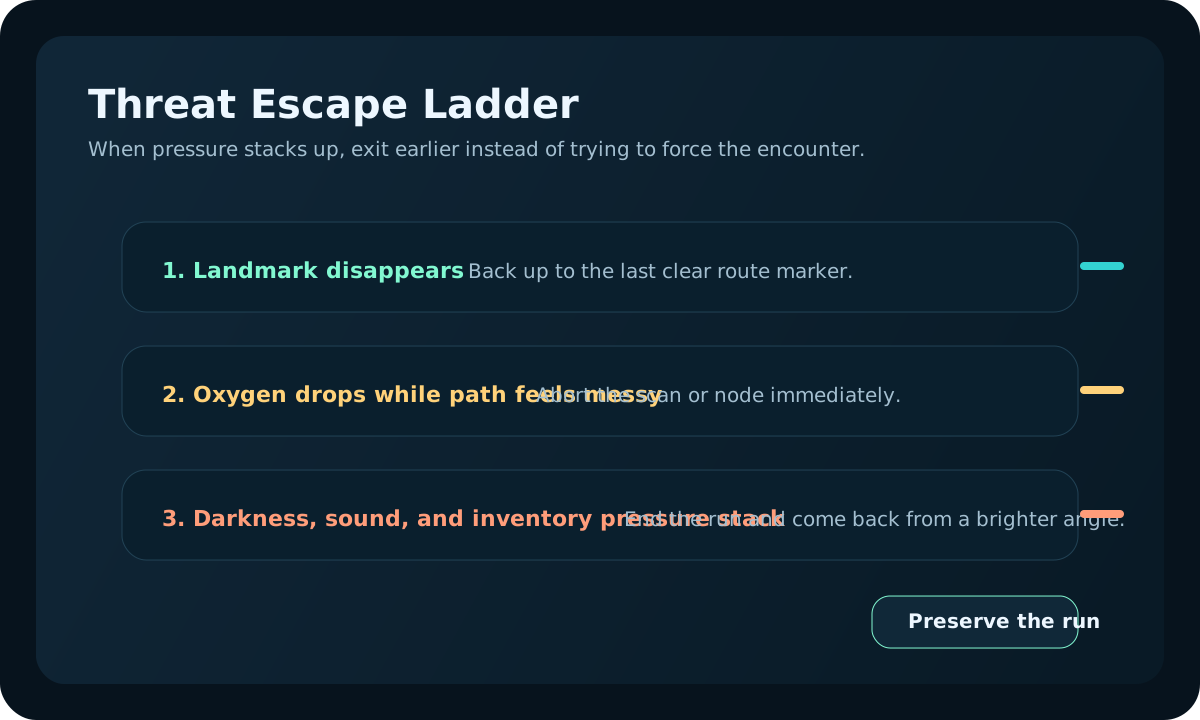
Use this as a retreat ladder: if warning signs stack up, leave before the encounter costs the whole run.
Stop moving deeper as soon as the creature changes your route.
A threat is manageable only if you still know the way home.
Turn toward the last clear landmark before checking inventory
or scanning. Safety comes before finishing the objective.
Bank the information: note the sound, depth, lighting, and
route edge where the encounter happened.
Re-enter from a safer angle later, preferably after oxygen,
storage, or vehicle support makes the same route less fragile.
Creature threat severity ladder
Not every encounter deserves the same reaction. Some threats are
just route noise, while others mean the current path is already
too expensive to keep pressing.
Threat level
What it usually means
Best response
Return later with
Single warning cue
The route is still readable, but the area is no longer free.
Slow down and keep the landmark in view.
A cleaner approach or better route memory.
Repeated harassment
The same path is asking for too much attention.
Leave and try a wider or brighter angle.
More oxygen, a smaller target, or a safer edge.
Route block
The creature has become part of the path, not just an event.
Bank the trip and choose a different route.
A new angle, a new biome edge, or a stronger support tool.
Panic chain
Visibility, oxygen, and threat pressure are stacking at once.
Retreat immediately.
Better margins and a shorter objective.
Avoid these early mistakes
Do not chase scans through a creature patrol path.
Do not fight for a material if the return route is already unclear.
Do not enter loud, dark, narrow areas with low oxygen margin.
Do not assume a route is safe because one quick trip worked once.
After a threat forces a retreat
Note which landmark, sound cue, or terrain shift warned you first.
Ask whether the problem was route choice, low oxygen, full storage, or pure curiosity.
Only retry after changing one part of the plan: angle, tools, timing, or target.
How to retry without repeating the scare
The safest second attempt is smaller, brighter, and more
specific than the first one. Treat the first failure as route
data, not as a reason to keep forcing the same path.
What failed
Change next
Retry goal
The creature appeared with no warning
Approach from a wider edge and keep one extra landmark in view.
Confirm the patrol area, then leave cleanly.
Oxygen panic made the route messy
Shorten the objective or add more oxygen margin first.
Take one useful item and get out before the timer becomes the blocker.
The inventory made the loss too expensive
Deposit materials and take only what the route actually needs.
Bring home one batch, not the entire area.
The same route keeps collapsing
Pick a different angle or a different biome edge.
Learn the boundary of the area instead of forcing the center.
Retry only if something changed
A failed encounter is useful if it gives you a better second
attempt. If the second attempt is the same swim with more panic,
the route is not ready.
Retreat cause
Change before retrying
Good retry goal
Skip retry if
Threat surprised you from blind terrain
Approach from a wider, brighter edge.
Confirm the patrol area, then leave.
You still cannot see a clean exit.
Oxygen forced panic movement
Shorten the target or upgrade oxygen first.
Scan one fragment or mark one landmark.
The route needs a perfect return to survive.
Full inventory made the risk expensive
Deposit materials and bring only the needed kit.
Gather one missing batch, not everything nearby.
You are carrying items you cannot afford to lose.
The same creature blocks the same path
Pick a different angle or a different route.
Learn the edge of the area, not the center.
The reward is not tied to a current craft.
Threat page handoff
Once the threat pattern is clear, do not keep reading threat
pages forever. Switch to the page that solves the next real
blocker.
Use safe-biome guidance when the route needs a calmer replacement, not another confrontation.
Use oxygen guidance when panic comes from low margin more than from the creature itself.
Use dangerous-zones guidance when the issue is the whole area, not one enemy type.
How to route around repeat threats
Return to the last safe landmark and approach from a wider or brighter angle.
Split the trip into scout first, gather later if the danger area is still unclear.
Abandon the route entirely if it keeps demanding more risk than the reward justifies.
What makes a threat worth respecting early
The early mistake is treating every scary creature as the same
kind of danger. A threat is more serious when it removes choices:
it blocks the only visible exit, pushes you away from oxygen,
makes you turn without a landmark, or forces you to carry
valuable materials through panic movement. If the creature is
loud but the route is wide, bright, and easy to leave, the right
answer may be a wider arc instead of a full retreat.
Use the page as a decision filter, not a monster list. The goal
is to keep useful runs alive: mark the edge of the risky area,
bank anything valuable, then return later with better oxygen,
a clearer target, and a route that does not depend on perfect
swimming.
Threat confidence check after one safer retry
Reviewed July 30, 2026: the page now treats early creatures as
route-pressure signals, not as a list of enemies to memorize.
After one safer retry, judge the run by what became clearer.