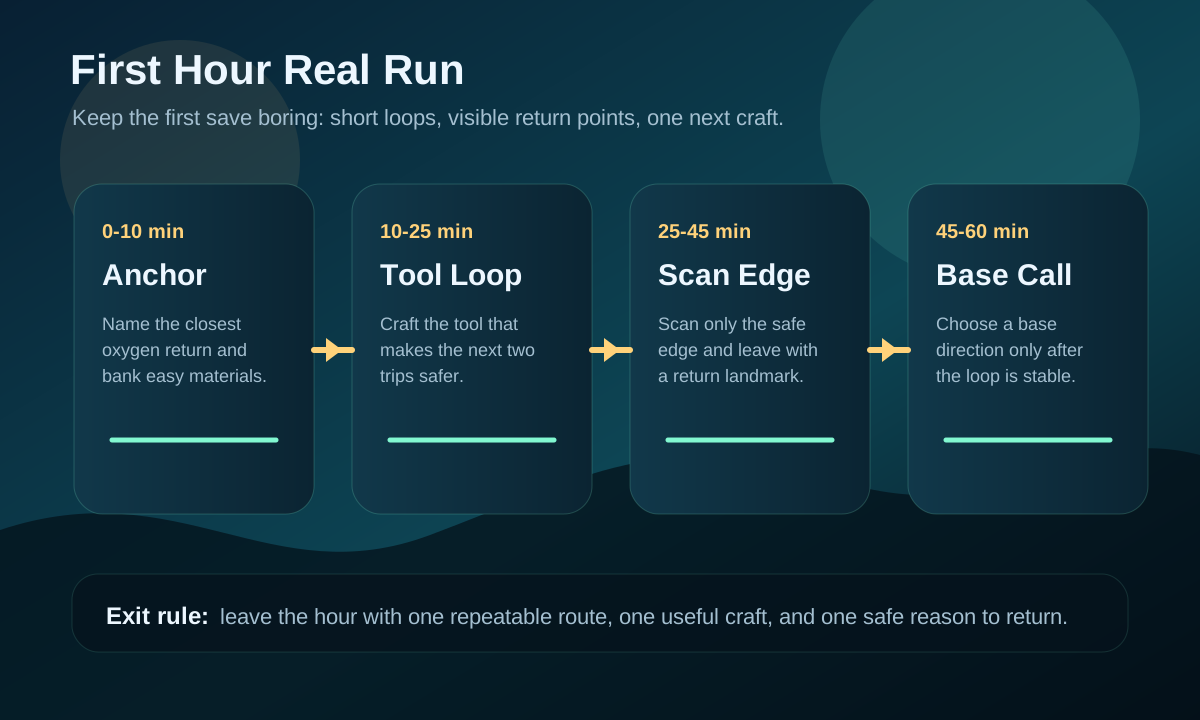
What should you do in your second Subnautica 2 session?
The second session is where many saves either settle down or get
noisier. A good second session should clean up the leftovers from
the first one, choose one useful target, and leave the save in a
better state than "still alive."
Published July 29, 2026Beginner lanePatch sensitivity: Low
Last reviewed August 17, 2026Patch sensitivity Low
This guide is rechecked when opening-session pacing, first-base timing, or early material routes change the second-session handoff.
Quick answer
Use the second session to do four things in order: reset food,
water, and oxygen; clean inventory and storage; choose one
material or route target; then decide whether the run is ready
for first-base progress or should stay in lighter loops for
one more session.
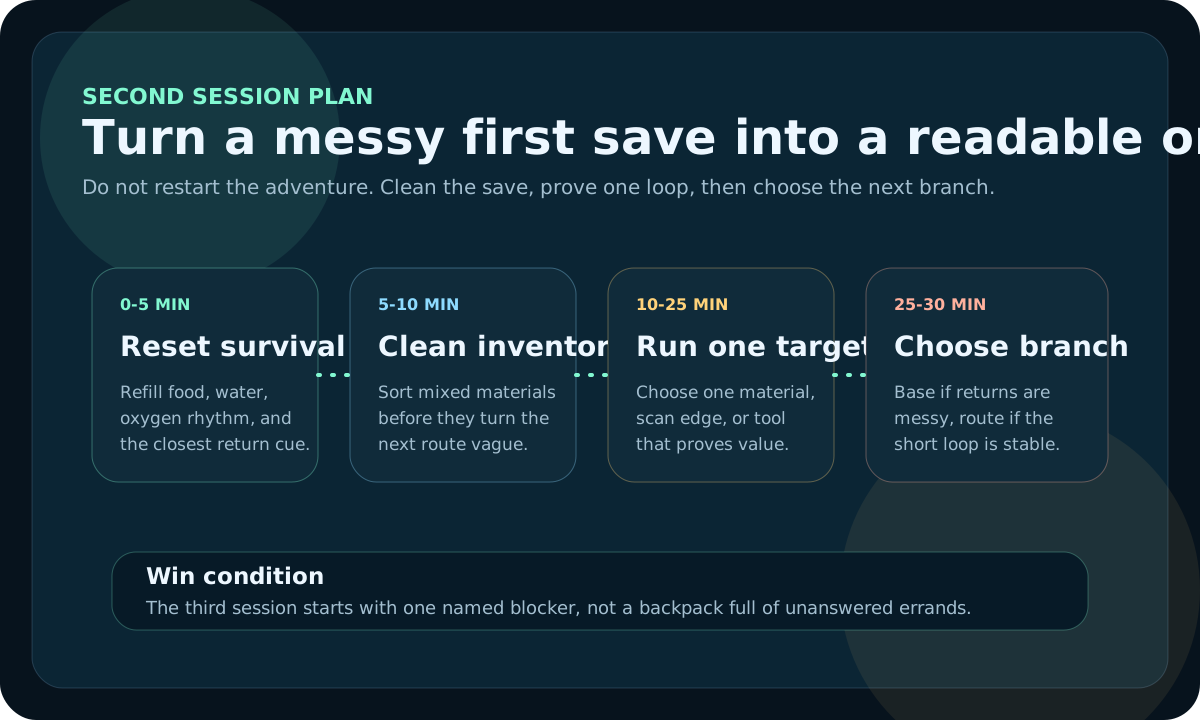
Second-session reset map
Use this map before swimming out again. It turns a messy first
save into a short, readable plan: reset survival, clean the
inventory, prove one target, then choose the next branch.
The second session should make the third session easier to start. If it ends with another vague backpack, shrink the plan.
Why the second session feels harder than it should
The first session usually ends with mixed materials, half-finished
ideas, and one memory of danger that still feels bigger than it
really was. When players reopen the save, they often continue
from that mood instead of from the actual state of the run.
That creates a bad second session: no clean target, no route
order, and no idea whether the base should happen now or later.
A useful second session is smaller and calmer. It should answer
one practical question: what one change will make the third
session easier to understand?
Read the save before you leave again
If the first session ended like this
Start the second session with
Do not do this
You logged out with random materials and no named craft.
Pick one craft or upgrade before you swim anywhere.
Leave with the same mixed inventory and hope the route becomes clearer outside.
You almost drowned on a route that looked easy.
Retest only the safe half of that route first.
Treat the near-failure as proof you are ready for a deeper or longer version.
You built something, but the base still solved nothing.
Give the base one job: storage, craft flow, oxygen reset, or route support.
Expand the footprint before the first room removes friction.
You returned alive, but progress still feels vague.
Name one material batch or one safe route objective.
Open three broad pages and turn the next trip into a mixed errand list.
A practical 30-minute second-session plan
Spend the first five minutes fixing survival bars, emptying mixed inventory, and deciding what the session should accomplish.
Use the next ten minutes for one safe material or route loop that answers that goal directly.
If the route still feels calm, use the next ten minutes to turn the batch into a useful craft, a clearer first-base decision, or a cleaner next route.
Use the last five minutes to bank value, write the next named blocker in your head, and stop before the session becomes a vague third errand.
This works because the second session does not need to be heroic.
It needs to turn a messy first save into a readable one.
If the second session is shorter or longer than 30 minutes
Real sessions rarely fit a perfect timer, so scale the plan by
decision weight instead of by ambition. A short session should
leave the save cleaner. A longer session should still protect
one main objective instead of becoming three unfinished plans.
Time available
Best objective
Stop before
10 minutes
Refill survival, unload mixed items, and name the next blocker.
Starting a deeper route that cannot be banked cleanly.
30 minutes
Run one safe route, turn one batch into a useful craft, and write the next target.
Adding a second route goal because the first one went well.
60 minutes
Do one route loop, one craft or base decision, then one proof run to test whether it helped.
Expanding the base or route before the first improvement saves time.
Two sample second-session plans for common saves
If you are not sure what your save needs, pick the sample that
sounds closest and keep the session deliberately narrow. The
point is to make the save easier to resume tomorrow.
Save state
Session plan
Finish line
You have supplies, but no clear next craft.
Unload everything, choose one missing tool or upgrade, then run one safe loop only for that batch.
The session ends with either the craft finished or one exact missing item written down.
You know the route, but returns feel slow and messy.
Repeat the route once, note the annoying return point, then decide whether a small base or storage fix would shorten it.
The third session starts with a clean base decision instead of a vague "explore more" plan.
You nearly failed a deeper swim last time.
Run only the safe outer edge, practice the turn-back point, and leave the deeper branch for a prep session.
You learn the landmark without turning the second session into a rescue attempt.
Visual read
Match the current save state before you pick the next page.
The save still feels fragile.
Open first-hour or oxygen pages when the problem still is survival rhythm, not progression ambition.
One missing batch is clearly holding things up.
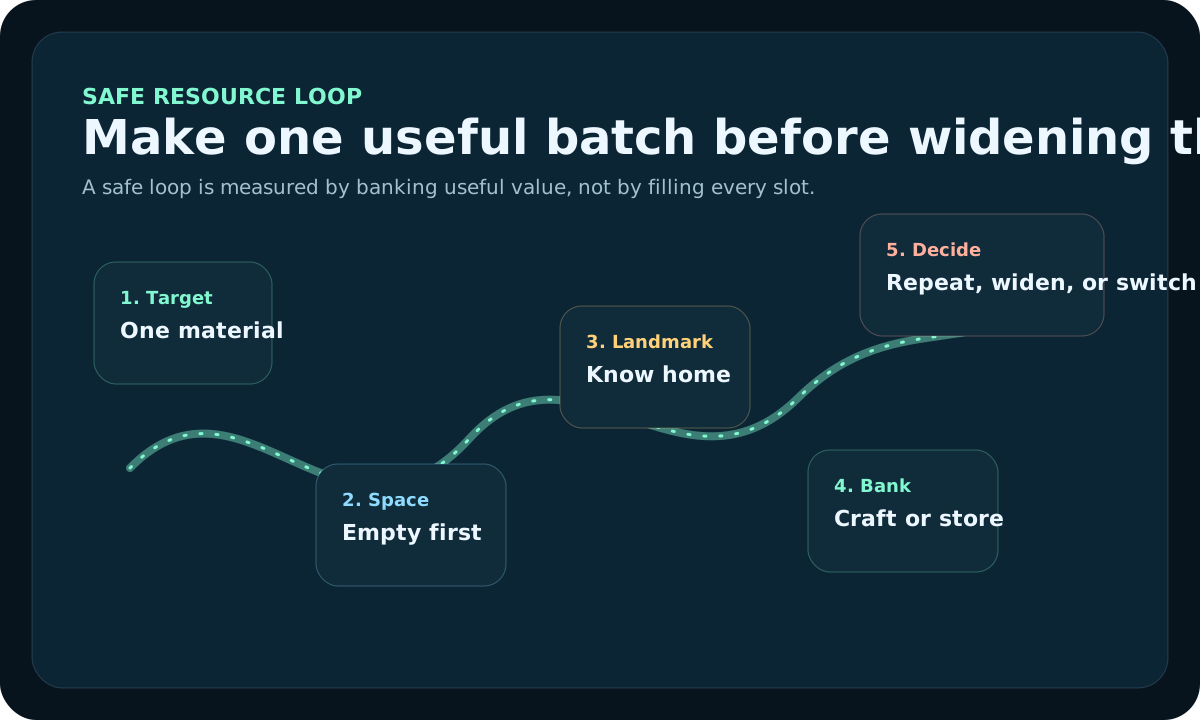
Open material-priority or safe-resource-loop pages when a named craft finally is the real blocker.
The route is stable enough that a home hub might help.
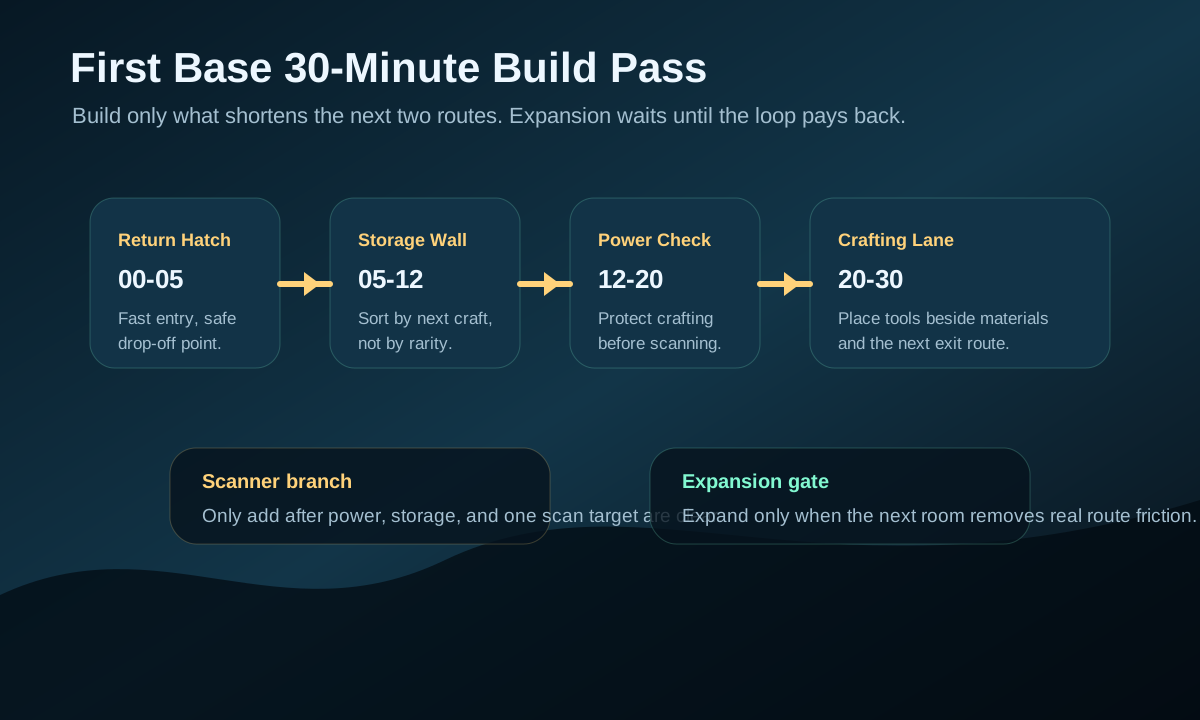
Open first-base timing or location guidance when repeated returns are now the main friction.
Should the second session build a base?
The second session is a good base session only when the run has
already proved why a base belongs. If you still cannot complete
short loops calmly, a base may turn into another unfinished
branch. If repeated returns are the clear time loss, then a
small first base can be the right second-session win.
Sign
Build now
Wait one more session
Storage pressure
Good trips keep ending with useful materials and nowhere clean to turn them into progress.
The inventory is messy because the session still has no named target.
Route value
The same return path clearly would improve with one home hub.
You still are not sure which route deserves repeated support.
Survival rhythm
Food, water, and oxygen are manageable enough that build time will not collapse the session.
Basic survival still interrupts every useful trip before it pays off.
Good signs the second session worked
If the second session ends with those five things, it did real
work even if it did not look dramatic.
Second-session end check before you save and quit
The second session should leave the save easier to resume. End
with one short audit so the third session starts from a real
blocker instead of a vague memory of being busy.
End check
Good answer
If not, do this before quitting
What changed?
One craft, route, storage fix, or base decision is visibly better.
Bank the most useful result and stop adding new goals.
What is still blocked?
The blocker is one material, one route, one system, or one survival issue.
Write the blocker in one sentence before leaving the save.
Where will the next session start?
At base, with inventory readable and the next trip easy to name.
Return home, unload, and separate next-craft items from overflow.
Which page should be opened next?
Only one follow-up guide clearly matches the blocker.
Choose first-hour, material priority, base timing, or route safety before quitting.
Choose the session plan from the save screen
A second session can start from very different problems. If you
log in with a full backpack, no food, and one half-finished
craft, the first win is a reset and a single target. If you log
in with clean supplies but a repeated route that takes too long,
the first win is testing whether a small home loop would save
time. Do not use the same plan for both saves.
Save-screen clue
First 10 minutes
Session finish line
Mixed inventory and no named craft
Unload, refill survival, and choose one missing item.
One exact material batch is ready or clearly missing.
Clean inventory but slow repeat returns
Repeat the route once and note the longest delay.
You have one justified storage, base, or route fix.
Near-failure on the last deeper swim
Retest only the safe edge and rehearse the turn-back point.
The risk rule is clearer, even if no new area is opened.
The session is successful when the save becomes easier to resume,
not when the map is wider. Stop with one next action that can be
stated in a sentence.
End the second session with a save-note, not a wish list
Reviewed August 17, 2026: this page was tightened for players who
come back to a save and immediately forget what the last route
was supposed to solve. A strong second session should end with
one sentence that makes the third session easier.
End note
Good example
Weak example
Next route
Repeat the safe Copper loop once, then craft the tool.
Explore more and see what happens.
Base blocker
Storage is the blocker; build one clear drop zone before expanding.
Make the base better.
Risk rule
Do not return to the deeper branch until oxygen margin feels calm on the edge route.
Try the scary route again later.
Open one follow-up page for the next session, not three